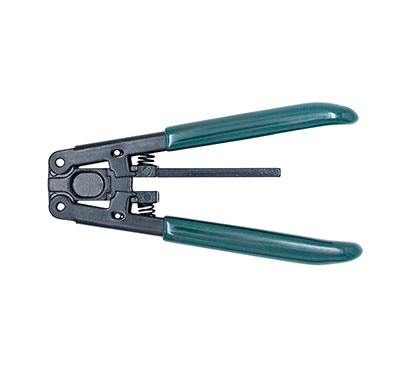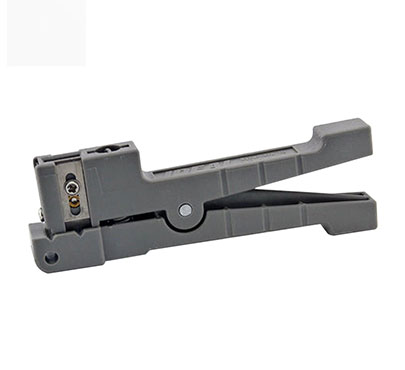

Cable attached machine: it is a kind of portable fast cable attaching tool for non-climbing, which can automatically complete the cable by placing the controller and other circuit elements inside
Send Email Get A QuoteCable attached machine: it is a kind of portable fast cable attaching tool for non-climbing, which can automatically complete the cable by placing the controller and other circuit elements inside
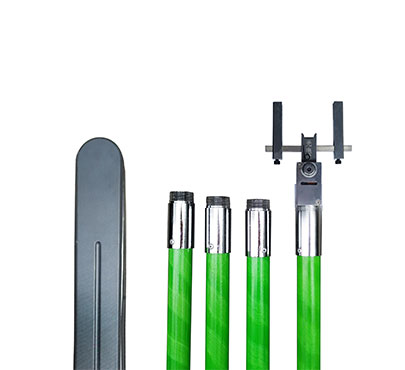
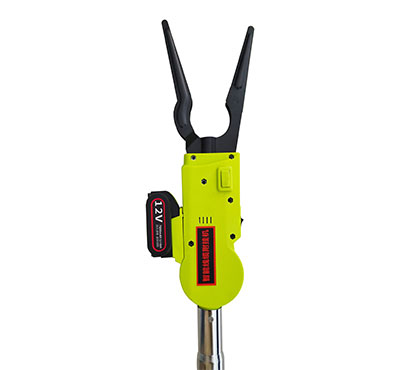
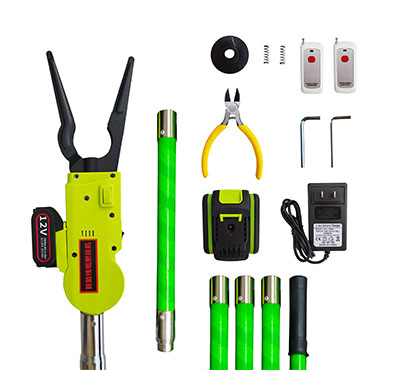
It is five times of the traditional manual work at high altitude and can work continuously for ten hours. It is not affected by the natural environment or objective external factors. It is suitable for the binding and attaching of all kinds of complex cables, which greatly improves the work efficiency and reduces the work difficulty. It can be widely used in the field of communication engineering for high-altitude work. The machine is mainly composed of five parts, including body, special wire disk, battery, remote control switch and handheld rod.
Body, one set of 6 meters attached rod, 2 remote controls, 2 plates of galvanized iron wire, 2 batteries, one charger
Battery:8000mAh/group, a fully charged battery case works more than 800 times, about 3km attached.
Attached rod:it can be insulated with 10kv. The material is composed of insulating glass fiber reinforced plastic epoxy tube, 1.2m/ piece
Galvanized iron wire:110 meters per plate, 300-500mm at a time, can be attached to 2km
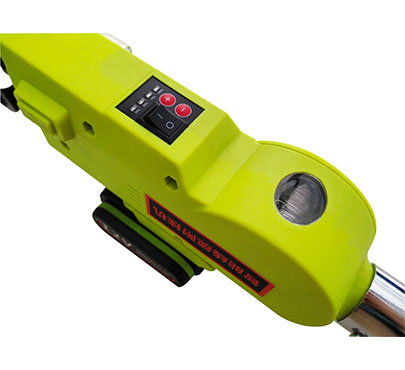
Switch of remote control:The remote control is 20 meters away from the open space, which can be used by partition wall
1.Take out the insulation rod of the battery and charge the lithium battery. The green light means full state, and the charging time is about 90 minutes.
After docking with the host machine, turn on the machine, and the buzzer will send out a prompt voice, indicating that the machine has been powered on
2.Rotate and remove the six-hole round cover which is used to fix the wire plate in the fuselage, and then put the wire plate customized by our company into load the specified position
3.Take out a plate of tie wire and straighten it by hand for 10cm, insert to the rectangular hole of the fuselage, transfer it forward to the bottom, and load the tie wire into it. Rotate the six-hole round cover to be tight (if the wire is not straightened, it is easy to cause the wire jammed, and the wire cannot enter the specified track)
4.Start the machine, use the remote control to lead the wire out for testing, and send the wire out according to the specified track to ensure the successful installation of the wire disc
Warning: Do not touch the wire walkway while the machine is working to prevent personal injury
5.Take out the insulation rod of appropriate height and connect the battery and insulation rod
6.Lift the fuselage and select the right line for construction
7.Place all the cables that need to be tied into the binding groove
8.Construction personnel press the remote control switch, the machine will automatic spinning, hinge, cut off
9.After the operation of a second time, do not operate several times in a row, so as not to twine wire together
10.If you do not work for a long time, you will hear the continuous beep of the machine. Please restart the power and the machine will resume its working state
11.To adjust the sliders in the tie wire aisle, loosen the two screws first, and then adjust them to the appropriate position. In the clockwise direction, gradually reduce the diameter of the circle formed by the wire, and otherwise increase. The best diameter of the lead coil is 83-85
12.Torque adjustment: In case of loose tie or easy break in use, can adjust the torque. Press the "+" if the tie is not tight enough, then the torque will be increased by one grade (the factory setting is 10 grade).
The buzzer will emit a symmetrical call, such as at 10 grades, it will ring 10 times continuously, and so on. Too tight (easy to break) adjust "--", until to appropriate position.
1.Make sure the outlet is clean and free of impurity
2.Do not place the machine at anywhere, please package it into the original outer packing when it is not used
3.Timely replacement of consumables (outlet pressure plate, wire cutter, etc.)
4.operation, open the box and clean the wire foam of the motor and gear box, so as to extend the service life of the machine
The product is guaranteed for one year from the date of purchase and three months for the battery. Charger, wire cutter, outlet press plate, hexagon socket wrench and wire clamp are not covered by the warranty.
It is not covered by warranty if damaged by man-made or natural disasters
1.When using this product, please read the instruction first
2.Do not be thrown at anywhere to avoid damage to internal parts, nor can it be knocked on the head, otherwise it will cause skewing
3.The attached machine should not be stored in a humid environment. When not in use, it should be stored in a dry, clean, non-corrosive gas environment
4.When the machine buzzer gives an alarm, the power must be turned off immediately and the operation can continue after the fault is removed
5. It is strictly prohibited for the battery to be close to fire, high temperature objects or directly exposed to the rainy environment
6.When charging, do not place it in a humid or high temperature environment, and require to use the designated charger, otherwise the consequences shall be borne.
7.The attached machine should not be put at the place where children can touch, so as not to cause harm
8.When it is working, do not allow hands to enter the strapping aisle
9. If battery has expanded, stop using it immediately and replace the battery
10.Please unplug the battery when the machine has been idle for a long time
11.Any injury caused by not using the product in accordance with the relevant operation and safety rules in this manual, the consequences shall be borne
12.Please wear a helmet before using the machine
1.When the wire dish uses for the last meter, please must follow the plastic wire dish to pull out the remaining wire together, do not directly use up or cut it, otherwise the machine channel will be blocked by the wire, unable to work. If the wire cannot be retreated, first check whether the scissors head is fastened. If the scissors are fastened, turn the torsion shaft for several times with diagonal pliers, then it can be successfully withdrawn
2.There may be loose winding, which is a normal phenomenon. In addition, when the new battery is out of power, or the power is low, the wire will also be loose winding, but it will be eliminated by replacing the fully charged battery. Please rest assured to use
3.When the new battery is used for the first time, you should first use up the power, and then charge it up once more, which can extend the battery life and serve you better.
1.Please wear a helmet before using the machine
2.The product has been adjusted from the factory. Please do not adjust the initial port or any other place
3.When you hear the continuous beep of the machine, please turn off the power and check the incision for impurity
4.The charging time is about three hours, please do not charge for a longer time
5.The machine is not waterproof, do not use it in rainy days
| Name | Cable Attached Machine | Model | YJ-800 |
| Application | optical cable / wire cable | Brand |  |
| Package | plastic box | Dimension | 62mm*30mm*12mm |
Fill in your needs We will reply you E-mail as soon as possible